How to get the best 3D stereo camera calibration with SceneScan/ SceneScan Pro?
Although we send our stereo vision system pre-calibrated and auto re-calibration is running constantly, you will not be able to avoid one or the other calibration with your system. A manual calibration is good, because you can be sure about maintaining the best measurement performances.
Nevertheless calibration should not consume too much of your precious time, nor cause trouble. Therefore we have written this guideline to show some tips and tricks to get the system calibrated and running again as quickly as possible.
The calibration procedure at a glance
For those in a hurry, here is the calibration procedure at a glace:
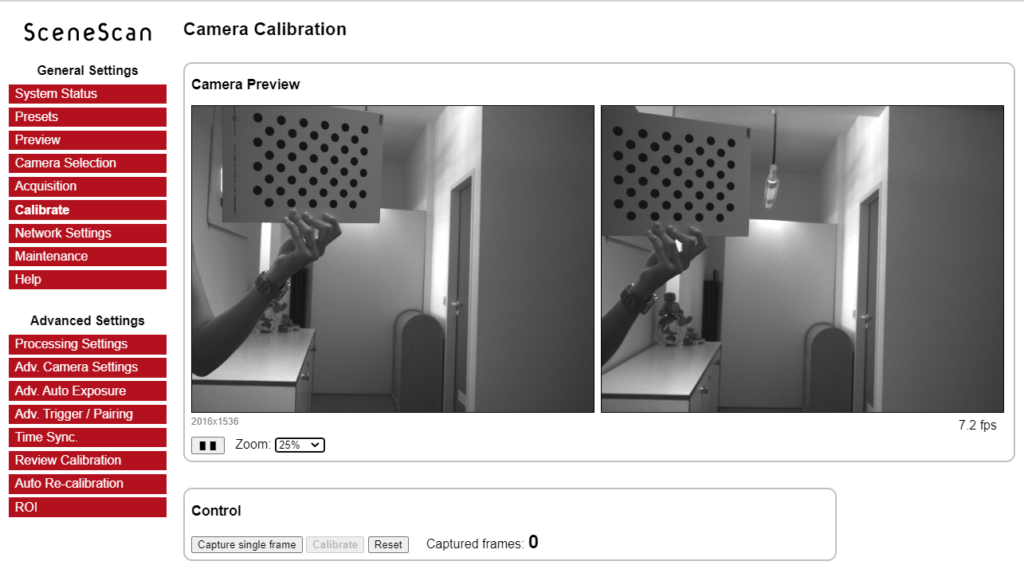
Go to the “calibrate camera” page of the SceneScan web interface
Place the Siemens star at the desired measurement distance
Make sure that the camera apertures are fully open
Adjust the focus on the Siemens star at the camera lenses
Fasten the focus lock screws
Check if the correct calibration pattern size is selected
Chose between auto capture or single frame
Make sure to detect the calibration pattern from as near to far as possible in every critical corner, detecting the pattern in both field of views of the cameras
Take at least 20 frames for calibration
After calibration, adjust the lenses to the desired aperture if needed.
The right focus for best image quality
The correct focus is essential for optimum image quality of the measurement results. The desired measuring distance should be reproduced as sharp as possible in order to guarantee pixel accuracy of each measuring object and its edges. So if you want to measure objects at a minimum distance of 1m, you have to focus on 1m using the Siemens star. Setting a precise focus is easiest when the aperture is fully open (smallest f-number). The desired aperture can be set after the focus has been adjusted.
Consider that each change of the minimum measurement distance means changing the focus and thus requires a re-calibration of the system.
Working with the calibration pattern
Tip 1:
Unlike focusing the camera on the desired measurement distance, a good calibration requires the detection of the calibration pattern from as close to as far as possible. This means that with a measuring field of 1 meter, not only from 0 to 1 meter, but from 0 to as far as possible must be covered by the calibration board.
Tip 2:
For a valid calibration frame it is important that the calibration pattern is always detected in the field of view of both cameras. Otherwise the frame is not counted.
Tip 3:
Calibration succeeds if all image corners are well covered by taking the calibration frames. So please take care that you are moving the calibration board as much around as possible.
Tip 4:
The more pictures are taken, the more precisely the camera will be calibrated. Should you be unhappy with the quality of any of the frames taken, you can delete them and add another individual captured frame. We recommend the capturing of 20 or more frames.
Tip 5:
Be patient because it is extremely important to work conscientiously and cleanly during calibration.